Deploy ScalarDL Ledger on Azure Kubernetes Service (AKS)
This document explains how to deploy ScalarDL Ledger on Azure Kubernetes Service (AKS).
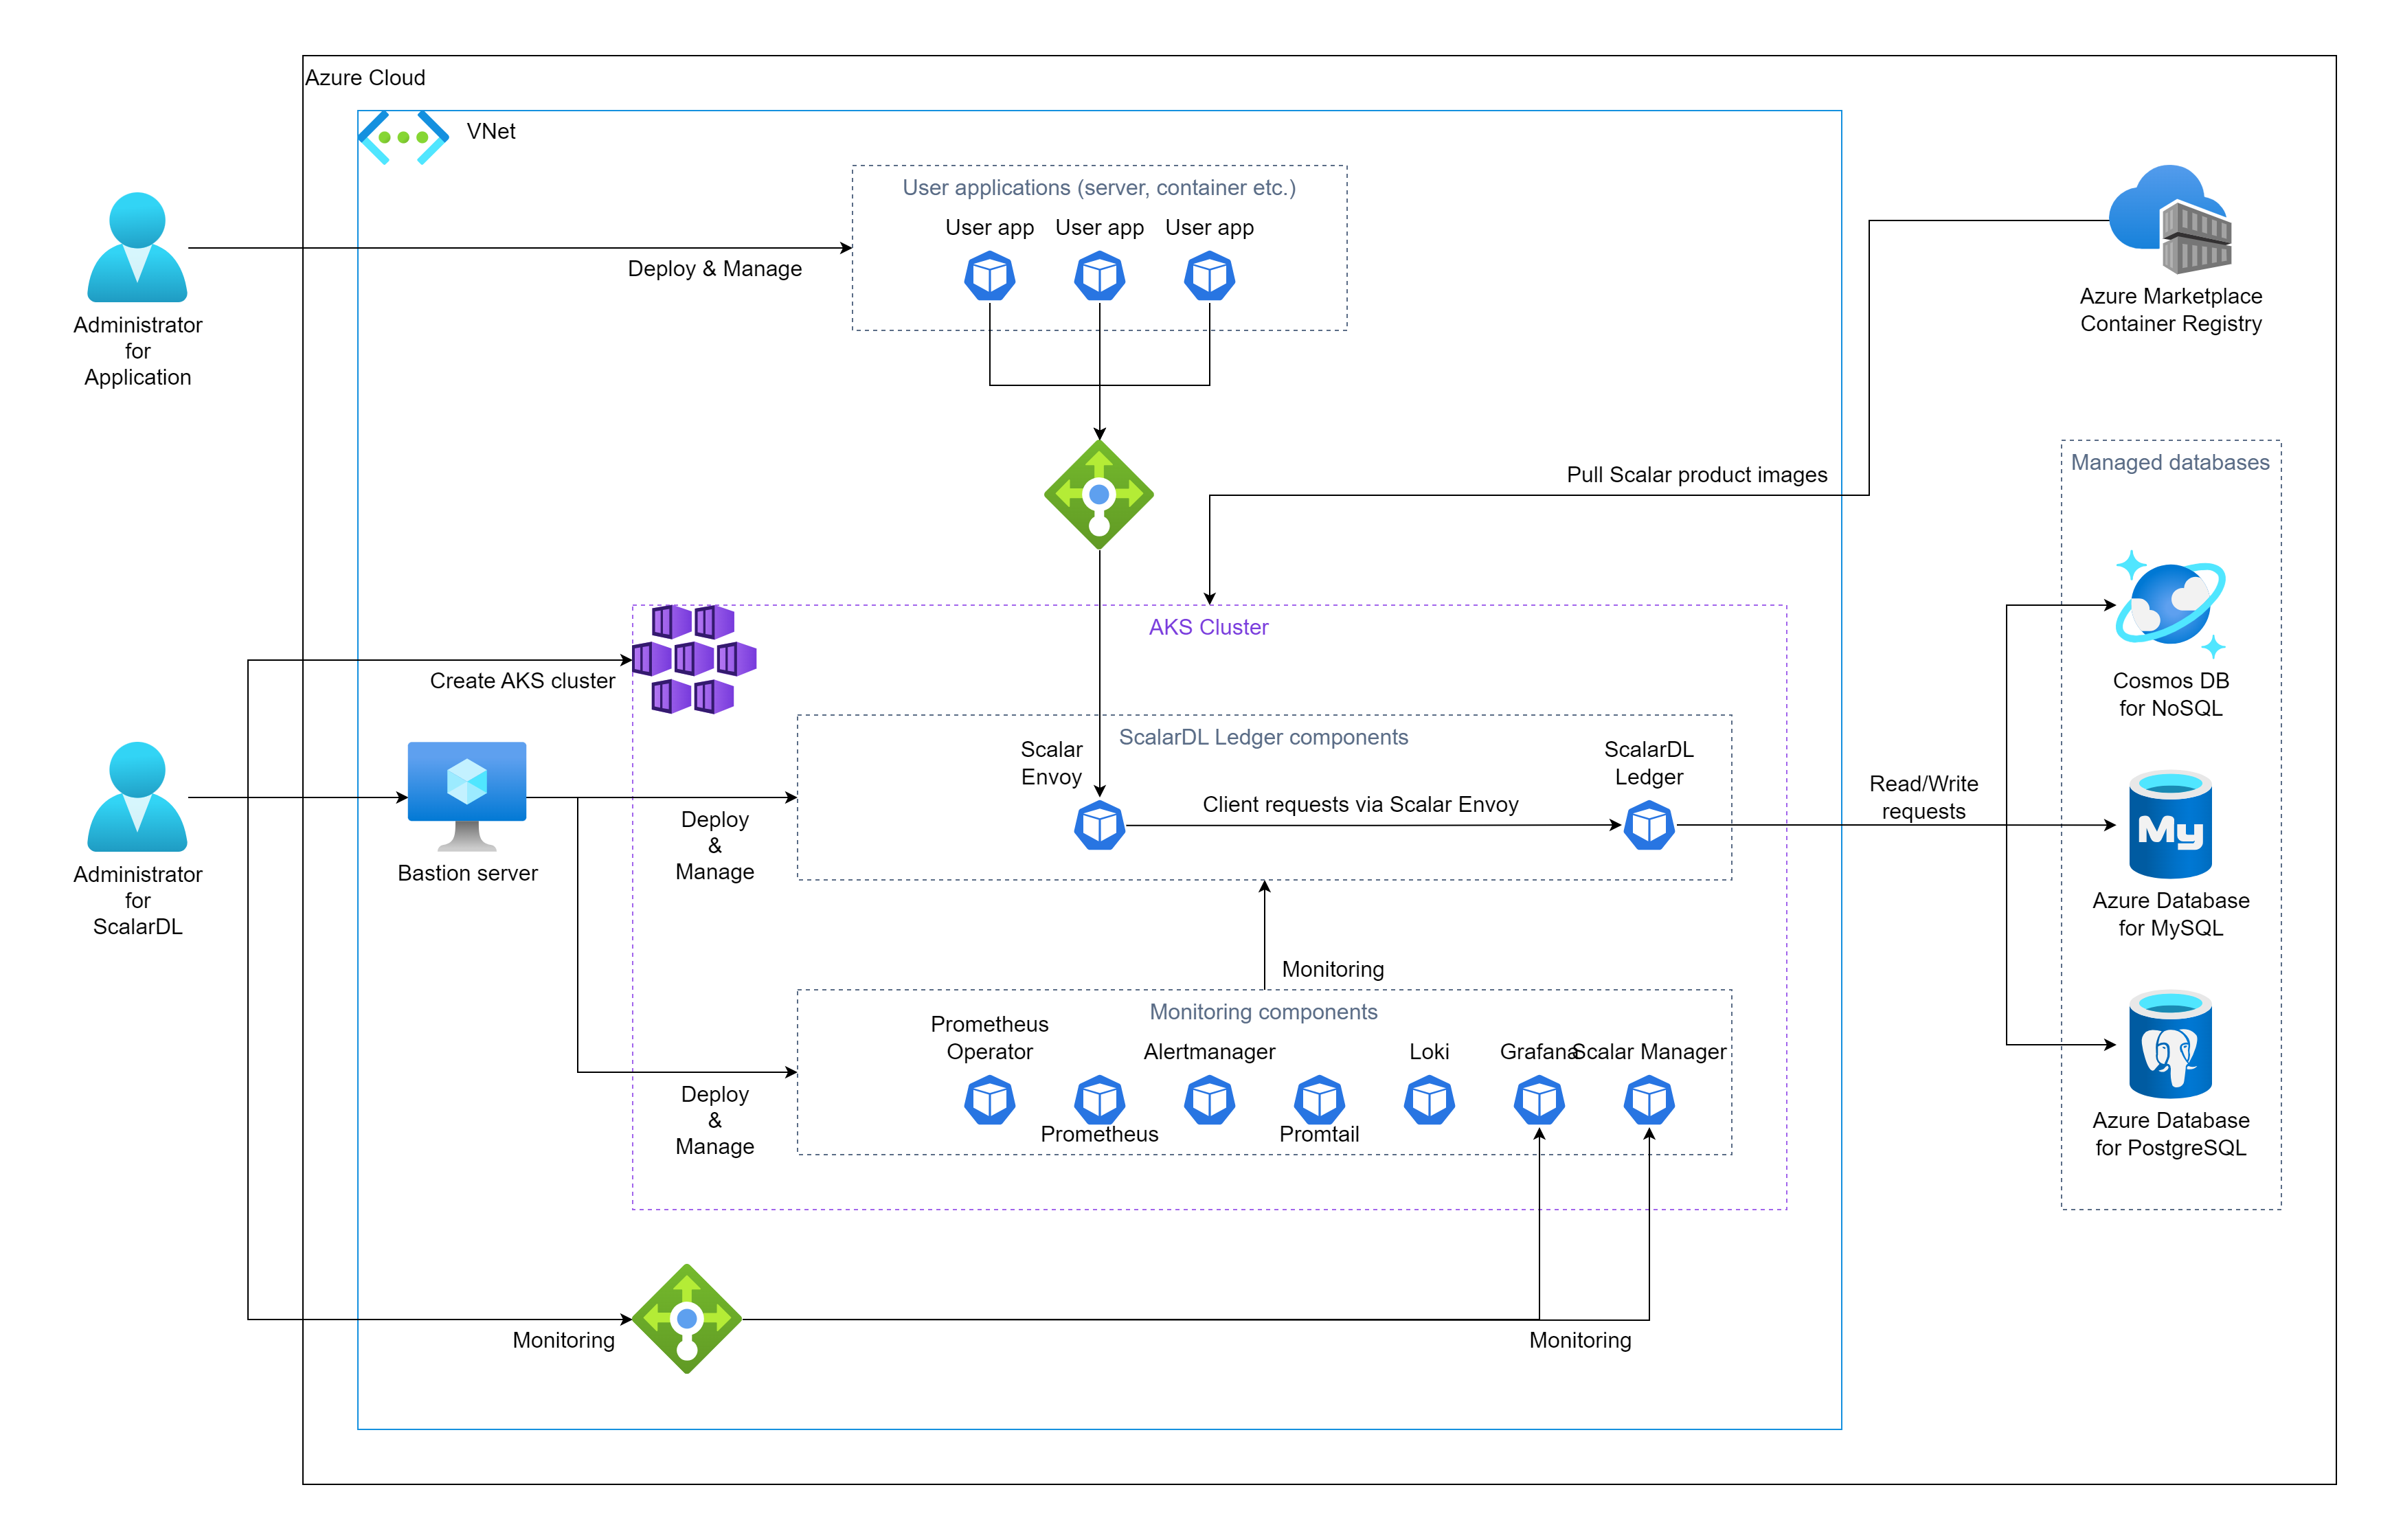
In this guide, you will create the following environment in your Azure environment.
Step 1. Get the ScalarDL Ledger container image
You must get the ScalarDL Ledger container image. For details, see How to get the container images of Scalar products.
Step 2. Create an AKS cluster
You must create an AKS cluster for the ScalarDL Ledger deployment. For details, see Guidelines for creating an AKS cluster for Scalar products.
Step 3. Set up a database for ScalarDL Ledger
You must prepare a database before deploying ScalarDL Ledger. Because ScalarDL Ledger uses ScalarDB internally to access databases, refer to ScalarDB Supported Databases to see which types of databases ScalarDB supports.
For details on setting up a database, see Set up a database for ScalarDB/ScalarDL deployment in Azure.
Step 4. Create a bastion server
To execute some tools for deploying and managing ScalarDL Ledger on AKS, you must prepare a bastion server in the same Azure Virtual Network (VNet) of the AKS cluster that you created in Step 2. For details, see Create a Bastion Server.
Step 5. Prepare custom values files for the Scalar Helm Charts for both ScalarDL Ledger and ScalarDL Schema Loader
To perform tasks, like accessing information in the database that you created in Step 3, you must configure custom values files for the Scalar Helm Charts for both ScalarDL Ledger and ScalarDL Schema Loader (for Ledger) based on your environment. For details, see Configure a custom values file for Scalar Helm Charts.
Step 6. Deploy ScalarDL Ledger by using the Scalar Helm Chart
Deploy ScalarDL Ledger in your AKS cluster by using the Helm Chart for ScalarDL Ledger. For details, see Deploy Scalar products using Scalar Helm Charts.
Note: We recommend creating a dedicated namespace by using the kubectl create ns scalardl-ledger command and deploying ScalarDL Ledger in the namespace by using the -n scalardl-ledger option with the helm install command.
Step 7. Check the status your ScalarDL Ledger deployment
After deploying ScalarDL Ledger in your AKS cluster, you must check the status of each component. For details, see Components to Regularly Check When Running in a Kubernetes Environment.
Step 8. Monitor your ScalarDL Ledger deployment
After deploying ScalarDL Ledger in your AKS cluster, we recommend monitoring the deployed components and collecting their logs, especially in production. For details, see Monitoring Scalar products on a Kubernetes cluster and Collecting logs from Scalar products on a Kubernetes cluster.
Remove ScalarDL Ledger from AKS
If you want to remove the environment that you created, please remove all the resources in reverse order from which you created them in.